Halloween crafting has evolved and I will be sharing new projects for all of the upcoming holidays on Sonoran Living.
Meanwhile, you are welcome to join me on a journey into the Terri O craft archives. Don’t be scared as we encounter my Famous Dancing Ghosts‼

Now you might ask why they are famous, but if I told you, well, let’s just say the results could be frightening!
And, I like fun soooo much better! Let’s have a contest. Comment on this blog post by August 31, and tell me why you think my dancing ghosts are famous. I will send one random winner a set of my crafting videos!
Meanwhile, here’s how you can make the ghosts dance for you and your family:
Craft Supplies
- 6 White sheets cut in half. (Cut across the width)
- 6 Wooden steaks about 4 to 5 feet long
- 6 Plastic trash bags (or recycled grocery bags)
- Masking tape
- Newspaper
- Black acrylic paint and brush
- Fishing line
Instructions
- Pound stakes into the ground so they are stable. I put mine in a circle or around a tree.
- Crumble up newspaper and stuff it into the corner of a trash bag. Put enough in to make a normal size head. Wrap masking tape around it and attach it to the wooden steak.
- Drape one sheet over the trash bag and tie a small piece of fishing line loosely around the neck. Do this for all six steaks placing them about 3 feet apart.
- Grabbing a corner of each sheet tie them together to create the illusion of them holding hands. Using black paint, paint a face for each one.
- Now get ready to have the whole neighborhood stop by and tell you how clever you are! By the way, at the end of the holiday just wash the sheet and put the steaks away for next year.
- Mini Dancing Ghosts: The concept is the same except instead of stakes I used dowels and Styrofoam balls for heads!
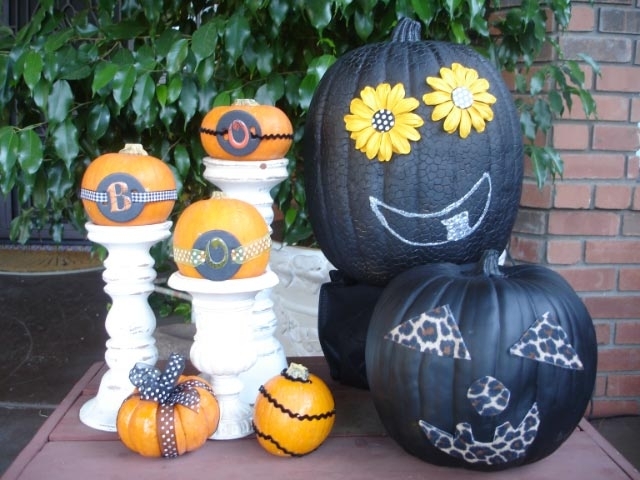
At the entrance to the dancing ghost party you’ll be greeted by a wealth of pumpkins that you won’t have to carve.
Black Pumpkins with Sunflowers:
Craft Supplies
- Faux pumpkin
- Black spray paint (flat)
- Adhesive
- Large Yellow paper flowers for eyes with a polka dot brads
- Silver glitter glue for mouth
- Silver rhinestones for a tooth
Instructions
- Paint pumpkin and let dry.
- Attach brad to flowers and glue for eyes.
- Draw a mouth shape with glitter glue and fill in tooth with rhinestones.
Black Pumpkins with Animal Print:
Supplies
- Faux pumpkin
- Black spray paint (flat)
- Adhesive
- Animal print felt cut out for eyes and a mouth
Instructions
- Paint pumpkin and let dry.
- Simply cut out the shapes and glue.
Boo Pumpkins:
Supplies
- 5 mini pumpkins (real or faux)
- Ribbon in various shapes and colors
- Chipboard tags
- Peel and stick letters
- Straight pins
- 3 candle holders
Instructions
- Paint three chipboard tags black and add letters.
- Attach with ribbon and hold ribbon in place with a pin
- Decorate the other pumpkins with ribbon and hold in place with pins.
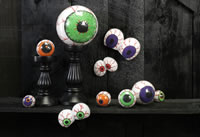
 These eyes make a nice décor looking over the appetizers.
Eerie Eyeballs
Craft Supplies
- Styrofoam ™
- Balls: 8”, 4”, 3”, 2”
- Eggs: 4” and 3”
- Dimensional Fabric Paint
- Crystal clear plastic wrap
Tools:
- Foam Cutter or Serrated Knife
- Toothpicks
- Heat Gun or Hair Dryer
- Scissors
- Low-temp Glue Gun
Instructions
- To create the double eyes, use the foam cutter or a serrated knife to cut the eggs in half lengthwise. Lay them on the table cut sides down.
- Glue them together (with low-temp glues) in unusual ways to create fun looks: Tilt the narrowed ends in and the wide ends apart to create “worried” eyes, or cut the narrow ends of the eggs off to create eyes that are peeking over something. Tips: Create a stronger bond by creating a larger surface for gluing: use the foam cutter to make a small flat spot where the two sides of the eyes meet. Toothpicks can be inserted between the pieces for additional support.
- Insert a toothpick to use as a handle as you paint the eyes.
- Paint circles for the colored iris on each of the balls or eggs as large or as small as you desire. Let dry.
- Paint black circles in the centers of the eyes for pupils, and outline the irises.
- Use red fabric paint to draw red blood vessels. Let dry.
- Cut squares of plastic wrap big enough to cover the eyeballs plus a little to overlap slightly.
- 8. Wrap each eyeball, pulling the plastic wrap snug as you go to smooth creases. Tip: when wrapping egg shaped eyes, wrap each half egg separately.
- Use a heat gun or a hair dryer (on hottest setting) to “shrink” the plastic wrap to the eyeballs, giving them a glossy look.
Halloween Garland
It only takes a few hours to create this spooky garland to string across the mantel or over a window. Even the kids can help! Use your imagination and try to come up with different shapes to sew & stuff. This is one project you can keep adding to year after year.
Craft Supplies:
- Felt-black, orange, green
- Floss
- Needle #22
- Cheesecloth
- Fabric stiffener Glow in the dark textured paint
- Black pipe cleaners
- Splat mat
- Fishing line
- Scissors
- Glue gun
- Wire snips
- Black yarn
- Wood cuts
- Stuffing ( I used bamboo fiber)
Project Directions:
- Make two layers of felt and cut out your designs. I cut out pumpkins, bats, spiders and crosses.
- Stitch them together with floss leaving a space for stuffing.
- Stuff them and stitch closed.
- To make the ghosts cut a small piece of cheesecloth and saturate with Stiffy.
- Place cheesecloth on the splat mat and form the shape of a ghost and let it dry for several hours.
- Drill holes in the wood cut outs then paint them with glow in the dark paint.
- Create the garland by tying together several long strands of yarn. The length depends on how long you want it to be.
- Attach all your creations with fishing line and hang.
- I used some items I found at the dollar store to fill in the gaps.
 Want treats your guests can take home?
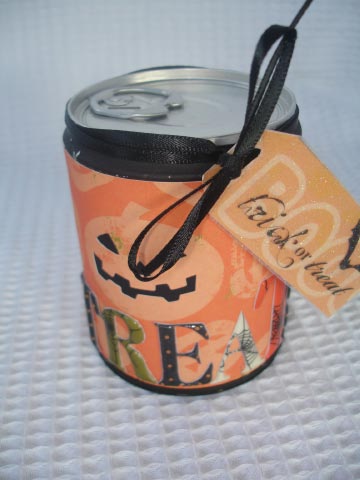
Tin Can Halloween Treats Craft Project
Craft Supplies
- Small tin cans with pull tab tops
- Safe can opener
- Halloween paper and embellishments
- Adhesive runner
- Tacky glue or E 6000 or industrial glue
Instructions
- Using your “safe” can opener (the one that takes the end off without cutting), open the cans from the bottom. Remove paper and wash. I made sure to keep the bottom with the can it came from just in case.
- Fill can with candy and glue bottom back on. I set something heavy on mine overnight to make sure it was firmly in place when it dried.
- Decorate the outside of the tin with paper and embellishments.
- Pass them out at your party and let everyone be amazed at how you got the candy inside the can, without opening it!

